Using K8s, Ansible, GitHub Actions all in one project
Creating a cool automation project together that'll give you an insight of Kubernetes, Ansible and GitHub actions all in this single project.


Introduction
Hello Reader, In this blog we'll be creating a cool automation project using multiple tools like kubernetes, Ansible and Github actions. If you want to checkout the whole code and workflow, you can visit my github repository
Now without wasting any time let's get started with the pre-requisites.
pre-requisites
- A Linux distro
- Docker
- Kind (k8s project)
- Ansible
- yamllint
- VS code
creating folder structure
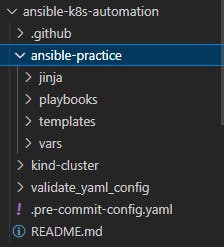
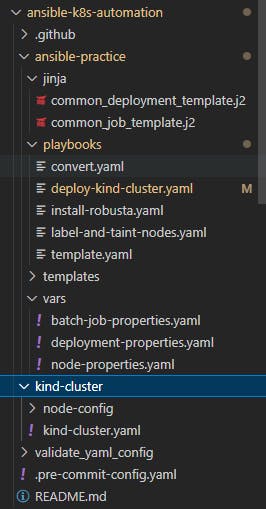
Once all these tools are installed we can get started with the initial steps i.e. creating the folder structure, for that you can create a simple folder named "ansible-k8s-automation" and create a sub-folder called "ansible-practice" and other folders names jinja, playbooks, templates, vars inside it, so the folder structure should look something like this
creating deployment jinja2 template
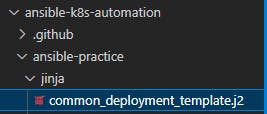
After creating all the folders lets start creating the generic template for k8s deployment, here we've used jinja2 for templating, you can use this jinja2 file and save it as "common_deployment_template.j2" like this
apiVersion: apps/v1
kind: Deployment
metadata:
  annotations:
    deployment.kubernetes.io/revision: "1"
  creationTimestamp: "2022-07-31T06:24:12Z"
  generation: 1
  labels:
    app: {{ item.0.image }}-deployment
  name: {{ namespace }}-{{ item.1 }}
  namespace: {{ namespace }}
spec:
  progressDeadlineSeconds: 600
  replicas: {{ item.0.replicas }}
  revisionHistoryLimit: 10
  selector:
    matchLabels:
      app: {{ item.0.image }}-deployment
  strategy:
    rollingUpdate:
      maxSurge: 25%
      maxUnavailable: 25%
    type: RollingUpdate
  template:
    metadata:
      creationTimestamp: null
      labels:
        app: {{ item.0.image }}-deployment
    spec:
      affinity:
        nodeAffinity:
          requiredDuringSchedulingIgnoredDuringExecution:
            nodeSelectorTerms:
            - matchExpressions:
              - key: size
                operator: In
                values:
                - {{ item.0.label }}
      containers:
      - image: {{ item.0.image }}
        imagePullPolicy: IfNotPresent
        name: {{ item.0.image }}-deployment
        ports:
        - containerPort: 80
          protocol: TCP
        resources: {}
        terminationMessagePath: /dev/termination-log
        terminationMessagePolicy: File
      dnsPolicy: ClusterFirst
      restartPolicy: Always
      schedulerName: default-scheduler
      terminationGracePeriodSeconds: 30
      securityContext: {}
      tolerations:
      - effect: NoSchedule
        key: spray
        operator: Equal
        value: {{ item.0.taint }}
Jinja2 is a general purpose templating language. Jinja2 is a library for Python 2.4 and onwards that is designed to be flexible, fast and secure. If you want to know more about jinja2 you can refer to the jinja2 documentation
Okay, now we've saved this deployment template into our jinja folder, lets leave this template for a moment and get started with creating the ansible playbooks to provision our kind cluster and with 6 node(1 Control Plane and 5 worker nodes)
provision kind cluster
To provision our kind cluster we'll add a few pre-requisite checks and then we will be needing kind-cluster-config file. Lets create a new yaml file inside our playbooks folder name "deploy-kind-cluster.yaml" and add these 3 steps into it
---
- name: templating j2 files into yaml
  hosts: localhost
  tasks:
    - name: check if docker is installed
      shell: docker
      register: docker_status
      tags: always

    - name: check if kind is installed
      shell: kind
      register: kind_status
      when: docker_status.rc == 0
      tags: always

    - name: check if the cluster is already up
      shell: "kubectl get nodes"
      register: cluster_exist_status
      ignore_errors: true
      when: kind_status.rc == 0
      tags: always
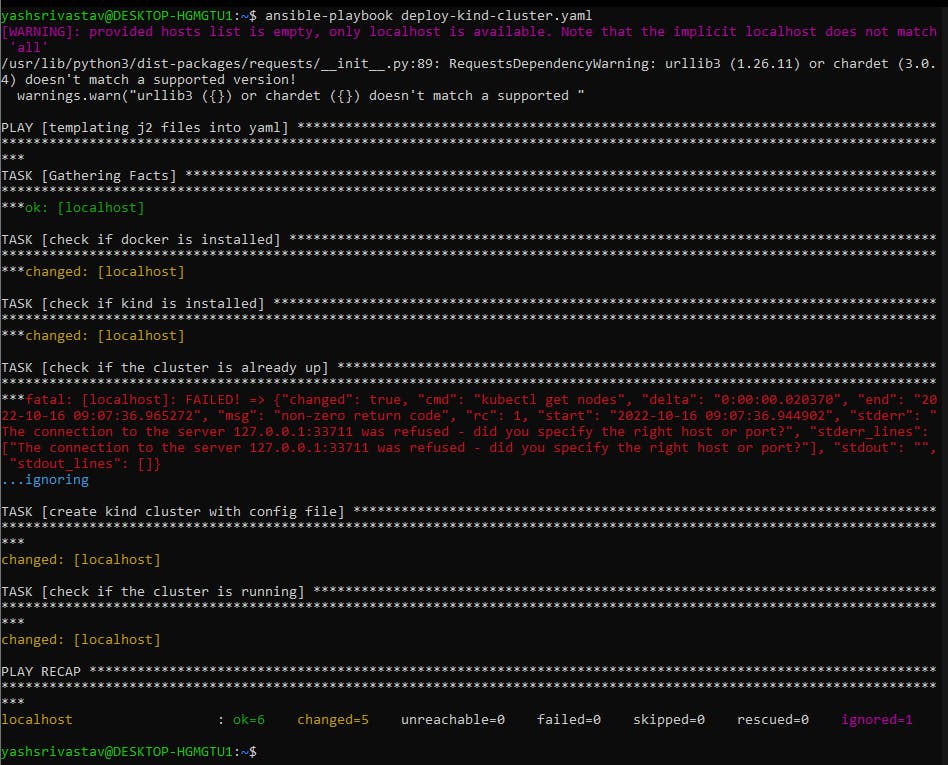
First two steps will check if docker and kind is already installed and the 3rd step will check if there is any cluster running already in your machine. You can run this playbook and check the output, which should look something like this. If you do not have any cluster running and have installed docker and kind in your Linux distro. From your ansible-k8s-automation folder, run
ansible-playbook ansible-practice/playbooks/deploy-kind-cluster.yaml

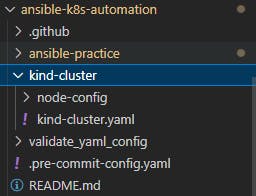
Lets create the kind-cluster config file, for that create a file named "kind-cluster.yaml" inside a folder called kind-cluster which should be outside ansible-practice folder like this
and add this configuration into you kind-cluster.yaml file
kind: Cluster
apiVersion: kind.x-k8s.io/v1alpha4
nodes:
  - role: control-plane
  - role: worker
  - role: worker
  - role: worker
  - role: worker
  - role: worker
after adding this configuration, lets add 4th and 5th step into our playbook
    - name: create kind cluster with config file
      shell: "
        cd;
        kind create cluster --name my-cluster --config ansible-k8s-automation/kind-cluster/kind-cluster.yaml;
        "
      register: cluster_status
      when: cluster_exist_status.rc != 0
      tags: always

    - name: check if the cluster is running
      shell: "kubectl get nodes"
      register: cluster_check
      tags: always
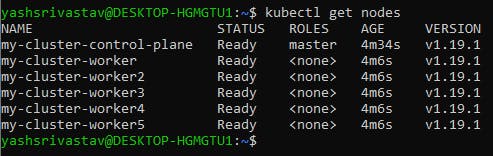
So, In 4th step we are running the kind create cluster command using our config file that we created and in 5th step it is doing the node check again to see if our cluster got up or not. To test this run the playbook command and your output this time should look like this
 So, from 4th step our playbook got to know if any other cluster is up or not, if not then provision the kind cluster and then do the node check again.
If you check now you'll be having a 6 node cluster running in your maching.
Great!! Now our kind cluster is provisioned, now the real game starts, lets move on to the next step of adding taints and labels to our nodes, for that create yet another yaml file(too many files, I know🥲) with name "node-properties.yaml" inside your vars folder for adding labels and taint values which'll act as our property file for playbooks.
Note: tolerations & node affinity for the taint values & labels are already added into the jinja template respectively.
node_config:
  - taint: spray
    taintValue: red
    label: size
    labelValue: extraLarge
    nodes:
      - my-cluster-control-plane

  - taint: spray
    taintValue: green
    label: size
    labelValue: small
    nodes:
      - my-cluster-worker
      - my-cluster-worker2

  - taint: spray
    taintValue: blue
    label: size
    labelValue: medium
    nodes:
      - my-cluster-worker3
      - my-cluster-worker4
      - my-cluster-worker5

  - taint: spray
    taintValue: blue
    label: size
    labelValue: large
    nodes:
      - my-cluster-worker5
and create a new playbook for adding taint and labels inside your playbooks folder with name "label-and-taint-nodes.yaml"
---
- name: Label cluster nodes
  shell: "kubectl label nodes {{ item.1 }} {{ item.0.label }}={{ item.0.labelValue }} --overwrite=true"
  tags: always

- name: Taint cluster nodes
  shell: "kubectl taint nodes {{ item.1 }} {{ item.0.taint }}={{ item.0.taintValue }}:NoSchedule --overwrite=true"
  tags: always
to refer this playbook from our "deploy-kind-cluster.yaml" we need to add this step after our 5th step
- name: label and taint nodes
      include_tasks: label-and-taint-nodes.yaml
      loop: "{{ node_config | subelements('nodes', 'skip_missing=true') }}"
      tags: always
Here, we are using ansible built-in loop module to loop over the property file that we created, but wait you'll be wondering we've not referenced our property file anywhere in this playbook, there enters the "vars_files" in the chat, here you can mention all the variable files that you create and use them to fill in the variables in you playbook, just like what we are about to do. Add this part in your "deploy-kind-cluster.yaml" playbook just below hosts field
---
- name: templating j2 files into yaml
  hosts: localhost
  vars_files:
    - "../vars/node-properties.yaml"
    - "../vars/deployment-properties.yaml"
  tasks:
    - name: check if docker is installed
      shell: docker
      register: docker_status
      tags: always

    - name: check if kind is installed
      shell: kind
      register: kind_status
      when: docker_status.rc == 0
      tags: always

    - name: check if the cluster is already up
      shell: "kubectl get nodes"
      register: cluster_exist_status
      ignore_errors: true
      when: kind_status.rc == 0
      tags: always

    - name: create kind cluster with config file
      shell: "
        cd;
        kind create cluster --name my-cluster --config ansible-k8s-automation/kind-cluster/kind-cluster.yaml;
         "
      register: cluster_status
      when: cluster_exist_status.rc != 0
      tags: always

    - name: check if the cluster is running
      shell: "kubectl get nodes"
      register: cluster_check
      tags: always

    - name: label and taint nodes
      include_tasks: label-and-taint-nodes.yaml
      loop: "{{ node_config | subelements('nodes', 'skip_missing=true') }}"
      tags: always
In a similar way you can create the folder structure like this(you can ignore job related files like "common_job_template.j2", "batch-job-properties.yaml" and "install-robusta.yaml" playbook as we are only focusing on deployments)
After creating all these files in their respective folders, you can fill in these details in their respective files
Playbooks:
template.yaml: It will create the required folder inside templates/ folder and then set the necessary permissions for that folder, then call another playbook called "convert.yaml".
convert.yaml: This playbook is using ansible built-in template module which converts the jinja template(we created in the start of this blog) into yaml file and pulling all the variables in it using the property files that we created inside our vars folder, then it does yaml linting to check if our generated yaml files are syntactically correct or not and finally run "kubectl create deployment -f " command to create the deployment inside the namespace that we pass from our playbook command.
vars / property files
jinja
kind-cluster config
Once all the files are created and set up, you can run the playbook command
ansible-playbook -e "namespace=sit2 type=deployment" ansible-practice/playbooks/deploy-kind-cluster.yaml --tags "create-deployment"
Note: "-e" tag is used to provide extra variables to your playbooks
Notice all the steps that are running in the playbook and at the end you should see this in your play recap.
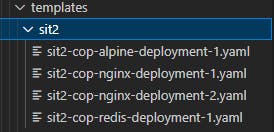
 Running the playbook will populate your "templates" folder with 4 deployment files
 If you check in your cluster you'll see 4 deployment created inside the namespace you provided
kubectl get deployments -n sit2

Automating through GitHub actions
Before moving to this step, you can delete all the deployments that you created with you playbook command or else it'll fail your GitHub workflow
kubectl delete --all deployments -n sit2

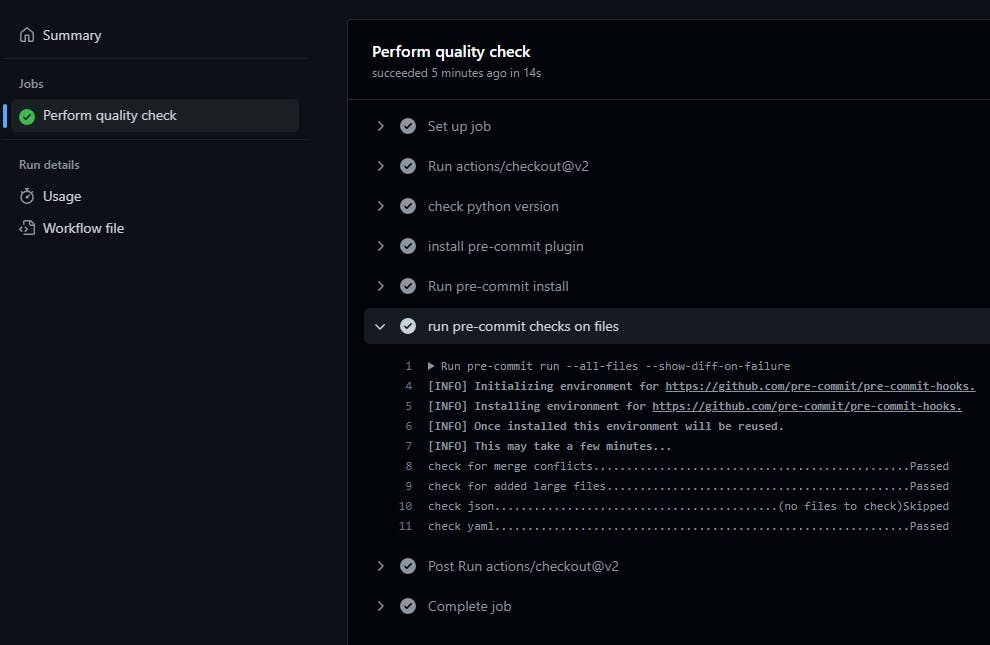
GitHub workflows are written inside a specific folder structure i.e. ".github/workflows" and in my repository I've created the yaml file to perform quality checks on my files and commits

workflows
I've used pre-commit hooks to check for
- merge conflicts
- large file commit
- yaml validation
- json validation
Note: the workflow is running on a self hosted runner(my pc) so it won't run until I bring my runner up. You can look at github docs for setting up self-hosted runners for your own repositoris
cloning the repository
Lets get started with cloning the repository into your local machine, move to whichever location you see fit to clone the repository into and then run
git clone https://github.com/Yash-Raj-srivastav/ansible-k8s-automation.git
cd ansible-k8s-automation
You'll be inside the main branch, to change it , you can cut a new branch from main.
git checkout -b <your-github-username>

create a new yaml file with "github-id".yaml inside "public/data/" you can use this template to add your skills into it. yash-raj-srivastav.yaml
name: Yash Raj Srivastav
bio: DevOps Engineer
skills:
- Java
- Groovy
- Python
- Shell/bash scripting
- SpringBoot
- Jenkins
- GitHub Actions
- WebSphere Commerce
- WebSphere Message Broker
- IBM Sterling OMS
- Docker
- Kubernetes(CKAD certified)
- Ansible
- AWS services
- prometheus
- grafana
location: India
interest: DevOps, Open Source, CNCF
add your changes
git add .
Then commit your changes
git commit -m "added your-github-username details"
 push your changes to upstream
git push --set-upstream origin "your-github-username"
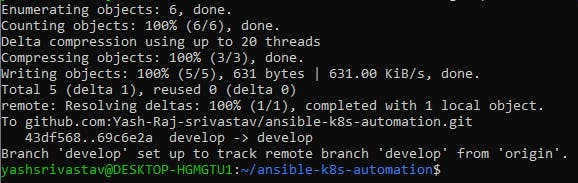 You should be able to see your branch in github, then you can raise a pull request to merge it to main, it'll trigger the github workflow script "validate_yaml.yaml" and validate your yaml file
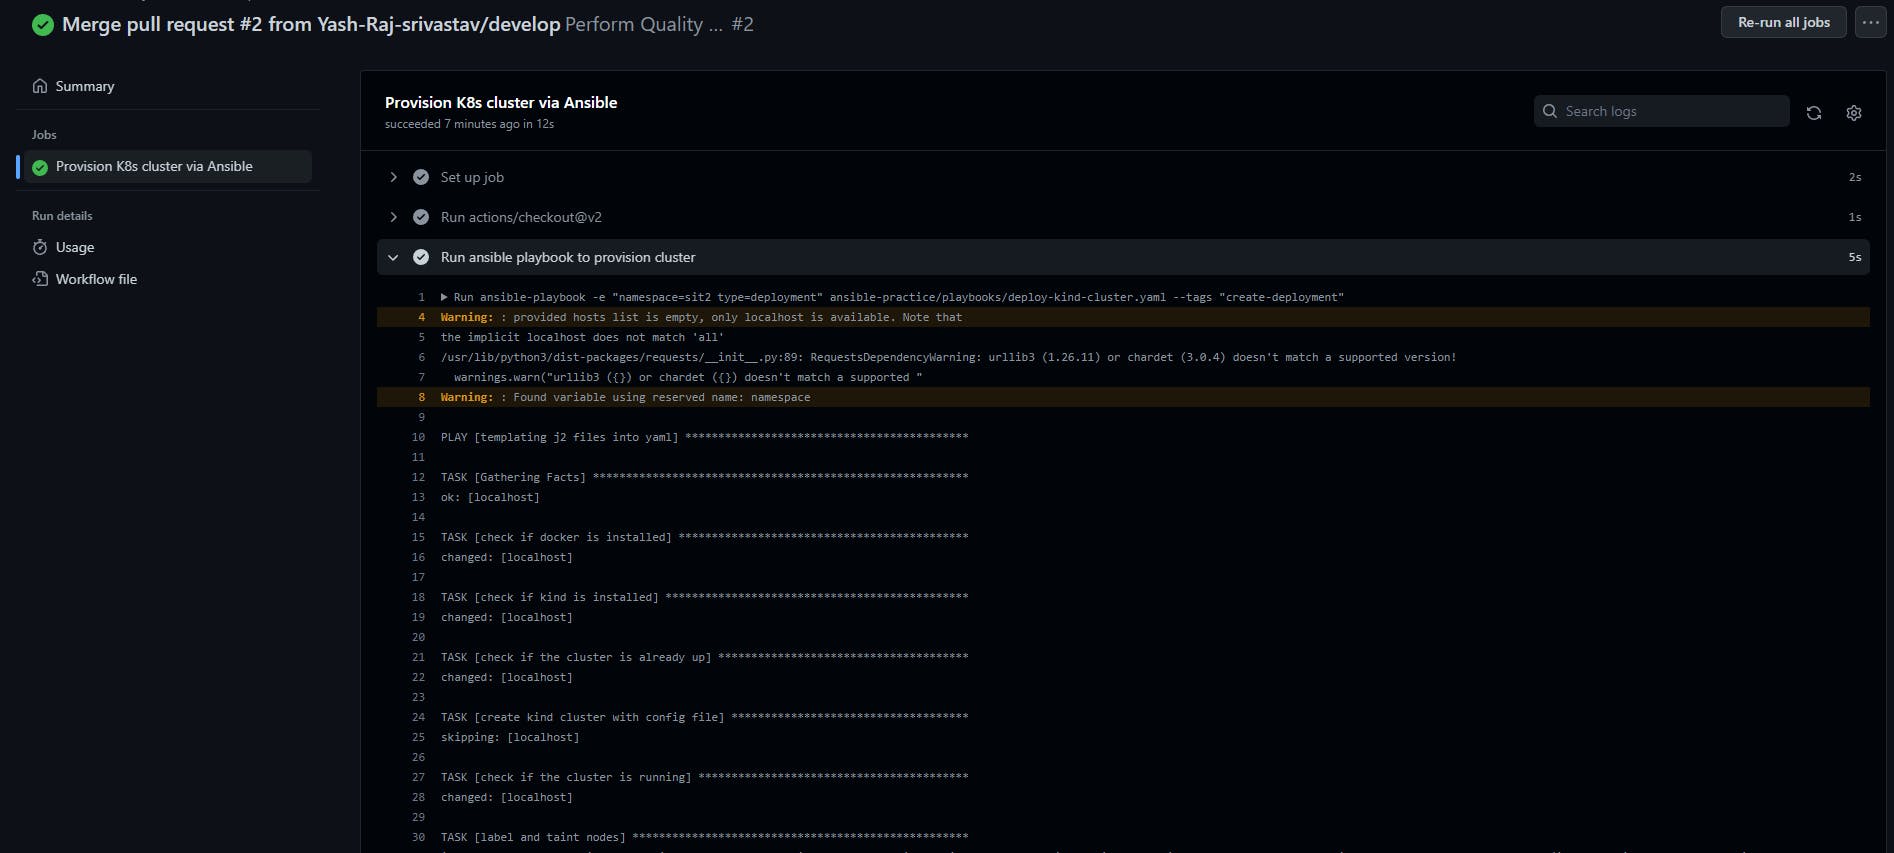
 Upon merge, another workflow script will be triggered called "provision_cluster.yaml"
Congrats!!, you made your contribution to this project.
Summery & workflow diagram
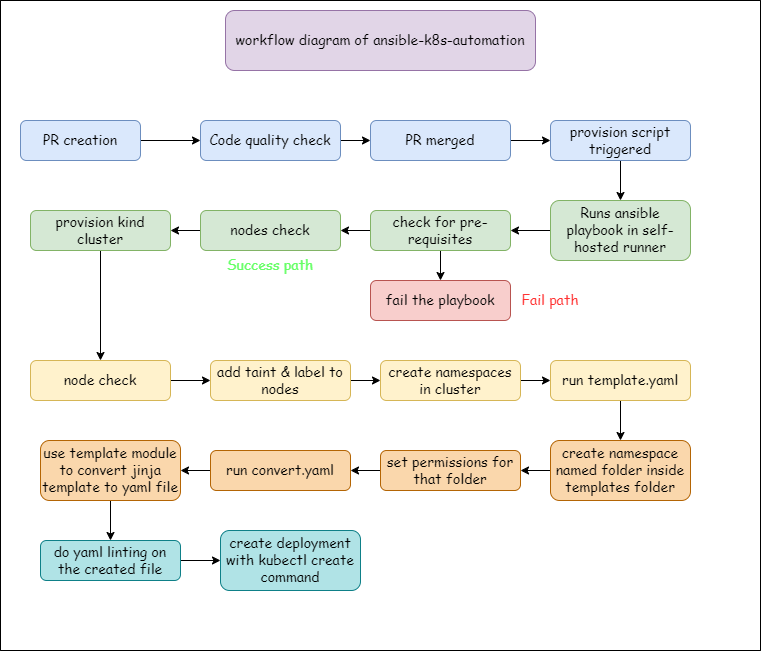
- provisioning kind multi-node cluster
- using ansible to automate cluster provisioning and adding properties into nodes
- running a deployment into your cluster using just a single template
- finally triggering the code quality check and ansible-playbook command on creation of a PR
This was a long blog, but at the end you'll have a working automation project to provision your k8s cluster and add taints, labels and create namespaces into it using ansible and everything gets triggered just by creating a Pull Request, Isn't this AMAZING to see how automation can ease everything for you.
Suggestions are welcomed in the comment section. I am still working on integrating more DevOps tools into this project.
My Socials
- twitter: YashRSrivastav
- linkedin: Yash Raj Srivastav
Hope this blog helped you, Thanks for reading it, stay tuned for more awesome automation projects like this, until then see you in the next blog(sounds like ending a youtube vlog😂).